This Art Journal Sharing Thursday is all about experimentation. One of my favourite mediums in Acrylics, I’ve loved them for many years now and I love experimenting and playing with them. So I’ve been doing a bit of reading and a bit of play and a great place to collect the results is my art journal.
[There are some affiliate links in this blog post, so if you buy through them I do get a small amount of money at no extra cost to yourself. Thanks for your support!]

Reading List:
New Acrylics Essential Sourcebook Paperback by Rheni Tauchid
The New Acrylics: Complete Guide to the New Generation of Acrylic Paints by Rheni Tauchid
Acrylic Illuminations: Reflective and Luminous Acrylic Painting Techniques by Nancy Reyner
Rethinking Acrylic: Radical Solutions for Exploiting the World’s Most Versatile Medium by Patti Brady
Acrylic Revolution: New Tricks and Techniques for Working with the World’s Most Versatile Medium by Nancy Reyner
Get To Know Acrylic Gel Skins
I’m kind of obsessed with gel skins at the moment. Acrylic Gel Skins are all about spreading out a layer of acrylic gel or medium onto a non-porous surface. Once the layer is dry you can peel the gel off the surface and you have a gel skin.
I’ve got a range of various different types of gels and mediums from acrylic grounds for pastels to iridescent gels for adding sparkle and dimension to paints. You can also use paints to make gel skins as well, either mixed with a medium/ gels, pastes or on their own and then there are all those texture embossing pastes that you can use as well.

Acrylic Gels, Mediums, Pastes, Paints Tested:
Winsor and Newton Galeria Iridescent Medium
Golden Light Molding Paste
Golden Hard Molding Paste
Golden Molding Paste
Golden Clear Tar
Golden Absorbent Grounds (white)
Golden Grounds For Pastels
Golden Regular Gel (gloss)
Golden Soft Gel (matte)
Golden Polymer Medium (gloss)
Golden Interference Blue
Cosmic Shimmer Glitter paste
Setting Up The Acrylic Gel Skin Experiments
My aim for this experiment was to see how all the different acrylic gels and mediums that I’ve been collecting over the last few years work as a gel skin on their own, mixed with colour and stamped on.
For my non-porous surface I used a wooden board covered with a plastic bag (you can see it in the photo above, it is my working surface for messing things at the moment). I spread a thin layer of each gel or medium with a palette knife, added a bit of Golden fluid paint for colour to part of the layer and a paper label so I could remember which layer was which.
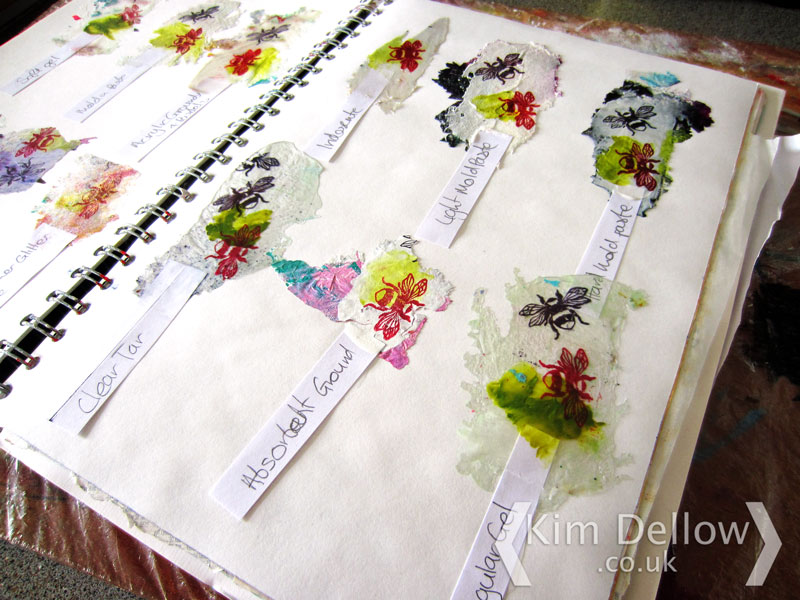
(Left to right Top three: Winsor and Newton Galeria Iridescent Medium; Golden Light Molding Paste; Golden Hard Molding Paste. Bottom Three: Golden Clear Tar; Golden Absorbent Grounds (white); Golden Regular Gel (gloss))
Once the layers were dry I stamped an image over the top, the red bee is stamped with Tsukineko StazOn and the black is stamped with Ranger Archival ink. I then peeled off the layer and glued it with a spot of regular gel into my art journal. Some of the gel skins are very sticky on contact with themselves or each other so keep them separate and protected with a sheet baking paper or thin paper.

(Left to right Top three: Golden Soft Gel (matte); Golden Molding Paste; Golden Grounds For Pastels. Bottom Three: Golden Polymer Medium (gloss); Golden Interference Blue; Cosmic Shimmer Glitter paste)
Which Acrylic Gel Skins Worked And Which Failed
It is well worth trying each of the gels, mediums, pastes, paints you might have as they all give different results. I loved the look of the transparent skins you get from using Golden Clear Tar, Golden Polymer Medium, Golden gloss gels. Then the semi-transparent skins you get from the Golden matte gels make interesting ‘encaustic’-like looks.
The Golden interference paint and Acrylic Grounds For Pastels were amongst my favourite as they resulted in translucent skins, and the pastels ground had a really interesting gritty texture. The Golden Molding pastes were fun too for making opaque skins and even paper-like skins.

(Left to right: Golden Soft Gel (matte); Golden Molding Paste; Golden Grounds For Pastels)
A couple of fails – well the Golden Absorbent Grounds skin was very brittle and flaked away when I lifted it off of the surface. Then the Winsor and Newton Galeria Iridescent Medium stuck very firmly to the surface, I’m not sure if I didn’t let it dry long enough or if I needed to try a different surface for this one so another experiment for another day.
Also the results of the stamping was a bit hit a miss, different skins responded differently to the two inks I tried (StazOn or Archival). There were skins that were very slippery and needed extra care to stamp on and the ink on some of the skins spread out or changed colour once dry, so again a good experiment to try on your skins for future project reference.
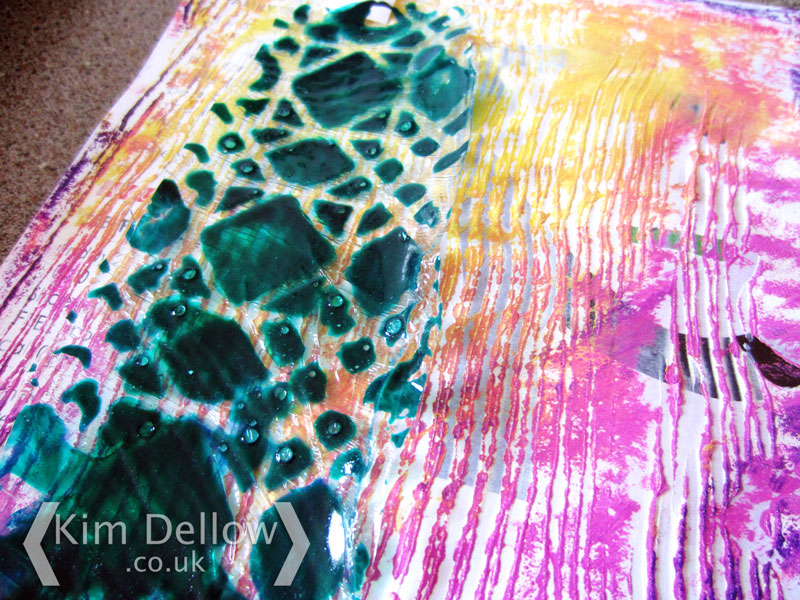
The final experiment to show is a little bit of fun making a skin using the Golden Clear Tar and a mask. I spread a slightly thicker layer of Golden Clear Tar than I used for my gel skin swatches on the non-porous surface and let it dry completely. I then mixed some Golden paint with some more Golden Clear Tar and added it to the dry Tar layer through a mask and let this dry.

A tip if you don’t want air bubbles is to mix the paint with the Clear Tar and let it stand for a while, but I was too impatient and just wanted to know what it would look like!
Thanks for popping in and sharing my Art Journal experiments with Acrylic Gel Skins, have you been making gel skins? I would love to hear about your experiences and what you have been making with them.
Catch you later Artinators.
Kim
Update 2017: So after lots of playing my favourite gel for making translucent gel skins is actually the Liquitex Pouring Medium. It makes great skins that aren’t as sticky when dry as some of the other gels and mediums I have tried!
If you want to see some of my gel skin projects using Liquitex pouring Medium then click on the photos below!


Hope i am understanding the term 'skins' correctly here? If i am have done this with Grunge Paste when it first came out. It is very delicate but i really did put down a very very thin layer. Moved it from a teflon sheet with a palette knife but didn't try to colour or stamp with it. Must give it a try again.
Really great review:-) x
This is the scientist coming out in you, Kim! I am utterly in awe of your dedication. The journal pages look like the results of much hard work. Be proud.
Hi Kim, I have done something similar with PVA, originally by accident. When teaching Art, some of my pupils were using an empty fruit container (from one of the supermarkets)it had texture in the bottom and when the PVA dries you end up with a gorgeous textured skin.
Thanks for sharing your ideas with us, Angela x