Hi Guys got a little make for you today that is just perfect for using up those little bits of paper so that you can have an excuse to buy lots of new paper of course! Which is lucky because Elaine has been adding some lovely new papers to Quixotic Paperie!
I’ve used the Fancy Pants Rusted Sun paper for the flower and leaves and added a button and some embroidery thread to finish the flower.
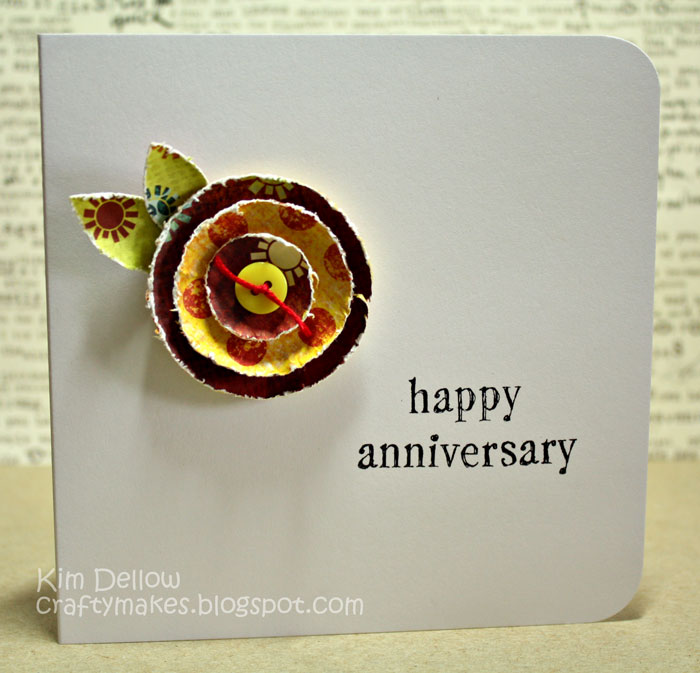
I’ve had a request to show how I make this little circle flower, they are one of my favourites so you will see them a lot on my blog from time to time! So if you haven’t made one of these before here is a very quick how to:
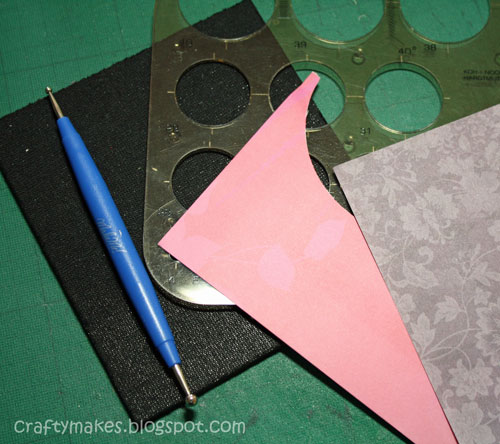
You will need:
Patterned paper, embossing tool and mat and something to make circles with such as a template or your nesties or you can use bottles to draw around if you don’t have anything else.
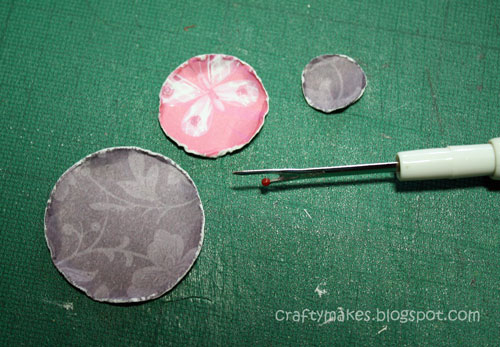
Cut out three circles from the patterned paper and have them decreasing in size so that they fit inside one another. The cutting doesn’t have to be perfect as you can distress the edges (I’ve used my favourite paper distressor a seam ripper/ unpicker).
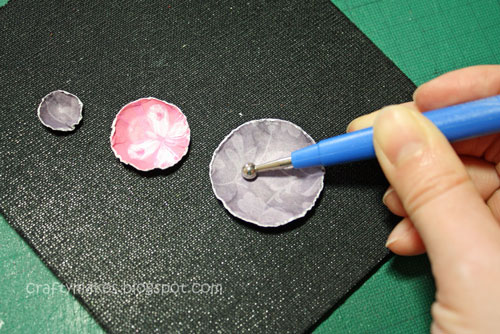
Using a foam mat as support, mould the circles into shallow bowl shapes by rubbing the large end of an embossing tool in the centre of the circle and working in circles move out to the edges. You will have to vary the pressure depending on the thickness of your paper. If your paper is thin then only use slight pressure.

Cut a couple for leaf shapes, distress the edges and mould just as before. I stick mine together with silicone glue but you can use tapes or other glues just as easily.
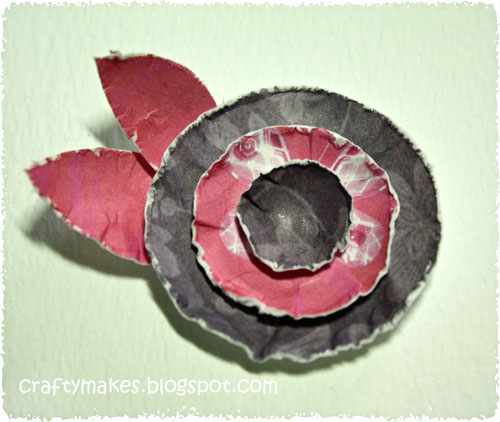
There you go, a little circle flower.
Hope you have a Saturday full of flowers.
Kimx
Hi Kim, great Card, and totaly great tutorial, thanks , and a great weekend to you. kind regards, Janine
These flowers are gorgeous, thanks for the tutorial,
Liz x
Oh Wow! Kim these are amazing. Thanks for the instructions will be having a play later.
Donna x
What a gorgeous card Kim.
Hugs Riet.xx
Great card! Brilliant idea! I should use it 🙂
Lovely, thank you very much – I'll give it a go. Great card too 🙂
Lovely card…. must try making some of those sweet flowers! Jo x
Gorgeous! Thanks for the how to…. xxx
Que lindo e facil
tks
These are great. I've been making some that are quite similar, but made in a completely different way. I'll have to try this way too!
A lovely little card Kim.
Thanks for the quick tut on this Kim. I am really into making my own paper flowers of late. I am using my seam ripper or Jack the Ripper as I call it to distress my paper after seeing you use one. Works great.
Have a super weekend Kim.
Thank you for this. I have been wanting to do this forever. Yours is simply lovely!
Smashing card and love your flower. Great tutorial, thank you for sharing Kim, Annette
I love these flowers and your card so much, Kim. You have inspired me to make some for Easter. Thanks for the easy to follow tutorial too. Have a lovely week. Hugs Cherry XXX
Hi Kim
what a wonderfull flower! You write you like all kinds of crafts. Come and look on my blog, I make all kind of stuff you like!
Nice day!
Thaks for the tutorial Kim I will have top give them a go.
Hugs Ali x